
Old pine baseboards carry history in their grain, but they also carry whatever decorative choices five or six previous owners made along the way. When you pull thick trim out of a late nineteenth-century farmhouse or salvage it from a renovation bin, you are often looking at four to eight coats of paint. Some layers are stubborn oil enamels, others are chalky latex, and occasionally you run into an early coat of milk paint bound tight to the wood fibers. Tearing through those layers without gouging the pine requires the right balance of chemistry, mechanical scraping, and patience.
Pine is a softwood, which means every misplaced putty knife edge or aggressive wire brush can leave permanent tracks. Heartpine from old-growth timber is noticeably denser than modern plantation-grown yellow pine, yet its springwood bands remain soft and susceptible to crushing. Stripping these profiles back to raw wood is messy, methodical work, but doing the job flat on sawhorses gives you total control over the outcome. With a sensible workstation setup and the proper scrapers, you can reveal the crisp profiles that made old millwork worth saving in the first place.
Checking for Underlying Wood Quality
Before buying gallons of chemical stripper, take time to inspect the physical integrity of each board. Salvaged trim often sat near drafty sills, leaky radiators, or damp floorboards for decades. Moisture tends to wick up the back side of baseboards where the wood remained unfinished, creating hidden pockets of dry rot. Press a dull awl or the corner of a flathead screwdriver into the back face, the bottom edge, and around old nail holes. If the tool sinks more than an eighth of an inch into spongy fibers, that section needs structural consolidation or excision before you invest hours in stripping the front face.
Look closely for insect damage. Powderpost beetles leave exit holes about the size of a pencil lead, along with fine, flour-like frass packed into internal galleries. A few scattered pinholes in dry wood are common in architectural salvage and do not necessarily mean active infestation, but crumbly edges that collapse under light thumb pressure mean structural loss. If you tap the board with a wooden mallet and hear a hollow, papery rattle, set that piece aside.
Health and safety testing comes next. Any paint applied before 1978 in residential settings may contain lead, and the thick bottom coats on Victorian or Craftsman trim almost certainly do. Pick up an EPA-recognized chemical test swab from a hardware store. Cut a tiny, angled notch into an inconspicuous profile edge with a utility knife so your test reaches the bottommost layer of paint, then apply the testing reagent according to the package instructions. If the test indicates lead, stop and consider your methods carefully. Never dry sand, torch, or grind lead-based paint. If you have significant quantities of lead-painted trim or lack a dedicated, isolated workshop with HEPA filtration, consult a certified lead abatement contractor to handle the initial stripping safely.
| Defect Type | Visual Indicator | Tool Assessment | Action |
|---|---|---|---|
| Active Wood Rot | Dark staining, cube-like surface cracking | Awl sinks effortlessly past 1/8 inch | Cut away soft sections or scrap the board |
| Old Beetle Boreholes | Clean 1 mm pinholes without fresh powder | Wood remains rigid under mallet tap | Safe to strip; fill voids later with tinted epoxy |
| Severe Cupping | Board arches across its width by over 1/4 inch | Ruler rocks heavily across the face | Evaluate if backing relief cuts can flatten it |
| Lead Paint Layer | Opaque primer under early oil enamels | Positive color change on chemical test swab | Use wet paste methods only; consult professional if unsure |
Applying Paste Stripper for Deep Softening
Liquid strippers run off vertical faces and pool in floor cracks, making them useless for ornate moldings. For detailed baseboards, thick paste formulations based on benzyl alcohol, dibasic esters, or dimethylethoxide provide the cling necessary to stay put. While harsh methylene chloride formulas act in fifteen minutes, they dry out quickly, release noxious fumes, and can burn bare skin through thin gloves. Modern low-VOC paste strippers work slower, but they can remain active for twelve hours or more under a containment layer, which lets them chew through six coats of paint in a single run.
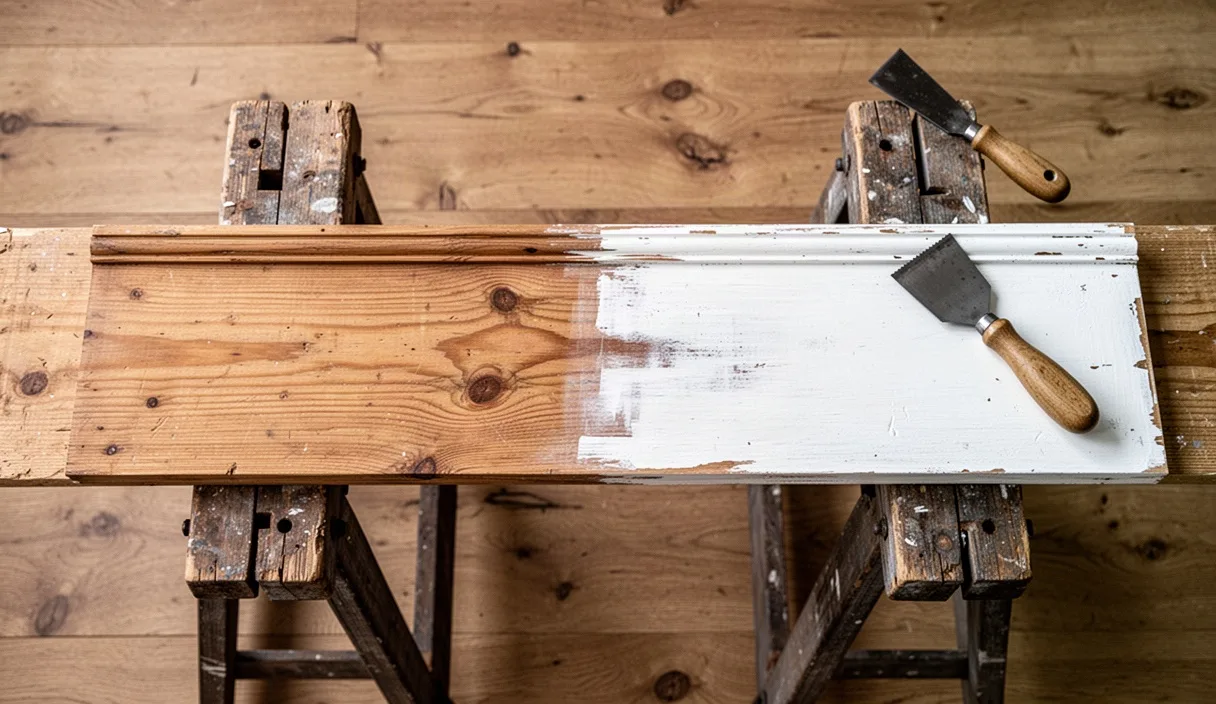
Lay your baseboards face up on a pair of sturdy sawhorses set to a comfortable standing height. Mix the paste thoroughly with a wooden stir stick so the active stripping agents do not stay separated at the bottom of the pail. Using a cheap natural-bristle brush, lay the paste onto the molding in thick, generous swaths. Do not brush back and forth as if you were painting a wall. Brushing spreads the product too thin and introduces air bubbles that break down the solvent emulsion. Aim for a continuous layer roughly an eighth of an inch thick across both the flat apron and the molded upper profile.
Once the paste is distributed, trap the solvents so they work down through the paint rather than evaporating into the room. Lay thin polyethylene sheeting or plastic kitchen wrap directly over the wet paste. Press the plastic down gently with your hands so it contacts the chemical blanket, eliminating large air pockets. Leave the boards alone for the dwell period specified by the manufacturer, which usually ranges from four to eight hours for standard latex-over-oil buildups, or overnight for dense historical milk paints.
- Application rate: Roughly one gallon of paste per forty to fifty linear feet of eight-inch baseboard with detailed cap profiles.
- Ambient temperature: Maintain the workspace between 65 and 75 degrees Fahrenheit. Cold temperatures below 55 degrees cause chemical action to stall.
- Protective barrier: Use butyl or heavy neoprene gloves. Standard thin nitrile tears easily when dragging scrapers across gummy chemical slurry.
Using Contour Scrapers on Curved Profiles
When the dwell time wraps up, pull back the plastic wrap on just one two-foot section to test the paint consistency. The coatings should have the texture of mashed root vegetables, lifting cleanly away from the wood when nudged. If the chemical is soft on top but hard near the pine, smooth the plastic back down and grant it another two hours. Once ready, pull the plastic back incrementally as you work to keep the paste from drying into an impossible crust.
Standard flat putty knives work fine on the wide, flat apron of the baseboard, but shoving a flat blade into a classic ogee or cove molding will cut sharp gouges into the soft pine. Instead, equip yourself with a pull-style contour scraper fitted with interchangeable blades. High-quality contour scraper kits include teardrop shapes, concave curves, convex rounds, and pointed triangle profiles that conform to historic millwork details.
Before drawing a steel blade across raw pine, soften the sharp outer corners of the scraper blade. Take a mill bastard file and lightly stroke the two pointed outer ears of the scraper at a forty-five-degree angle until they are rounded off. This tiny modification takes thirty seconds and prevents the tool from leaving parallel track lines down the wood whenever your hand tilts slightly. Pull the scraper toward you with steady, moderate downward pressure, following the run of the wood grain. Never push a scraper forward into soft pine; the blade can catch in an earlywood grain line and peel out a deep splinter.
- Angle the scraper handle roughly thirty degrees off the surface, leaning the blade slightly backward as you pull.
- Clear accumulated paint sludge from the blade after every single pass into a metal collection bucket using a scrap piece of cardboard.
- Shift your body along the board rather than overreaching, keeping your wrist locked to maintain an even blade angle.
- Wipe the scraped profile immediately with a damp rag to check for remaining paint skins before the surface dries.
Cleaning Out Grooves with Stiff Bristles
Even the best contour scraper blade fails to clear the tight internal corners known as quirks, beads, and fillets. These narrow recesses, often less than a sixteenth of an inch wide, hold onto old paint tenaciously. The common temptation is to reach for a rotary wire wheel chucked into a drill, but that is a quick way to chew the pine into pulp. Pine rings alternate between soft summer growth and dense winter wood, and any high-speed mechanical wire wheel will excavate the soft wood while leaving the hard wood raised, permanently ruining the crisp profile of the molding.
Manual agitation with the proper bristle material is the safe way forward. Keep two types of handheld detail brushes at your workstation: crimped brass and stiff industrial nylon. Brass wire is significantly softer than the steel used in utility brushes, so it removes softened paint residue without scratching the surrounding wood. Stiff nylon brushes are ideal for wider cove profiles where you need scouring action without leaving metal marks behind.
Dip your detail brush directly into a small container of fresh paste stripper or mineral spirits to lubricate the bristles. Work the brush in small, tight circles directly inside the profiles, letting the tips of the bristles break the chemical bond between the softened paint and the pine grain. As the slurry forms, wipe it away using coarse paper shop towels. For knife-edge quirk lines where even brass bristles cannot reach the bottom, carve a scrap piece of white pine or a hardwood dowel into a sharp wedge. Dragging this wooden pick down the groove cleans out the paint without marring the historical edges.
- Crimped brass brushes: Use for deep corners, ovolo moldings, and beaded edges where paint clings to end grain.
- Stiff nylon brushes: Use on broad curves, flat margins, and chamfered edges to clear sludge.
- Hardwood picks: Use on internal right angles and delicate quirks instead of screwdrivers or dental picks.
- Avoid carbon steel wire: Steel leaves tiny microscopic fragments in wet pine that react with moisture to produce dark, ugly rust stains weeks later.
Washing Residue and Preparing for Sanding
Removing the paint is only part of the stripping equation; neutralizing and washing away the chemical residue is equally critical. If stripper components remain inside the pine pores, they will interfere with the adhesion of your new stain, shellac, varnish, or primer. The wash method you need depends entirely on the chemical composition of the stripper you applied.
Solvent-based paste strippers dissolve cleanest with odorless mineral spirits or denatured alcohol. Pour the solvent into a wide-mouth pan and scrub the wood down thoroughly using medium-grade synthetic abrasive pads, which are far preferable to steel wool. Steel wool breaks down into tiny, hair-thin fragments that embed in the porous pine, rusting when water-based finishes touch them later. For water-rinsable strippers, use warm water mixed with about ten percent white vinegar to neutralize the mild alkaline salts in the stripper. Scrub the profiles with your synthetic pad, then immediately mop the liquid up with clean cotton towels.
Let the washed pine dry completely. This step requires real patience; wet pine looks clean, but its moisture content can spike above twenty percent during washing. Place the baseboards in a dry, well-ventilated space on edge with stickers, which are thin wooden laths, separating them to allow airflow on all four faces. Wait at least forty-eight hours before touching them with sandpaper. Testing with a moisture meter is best; wait until the lumber drops below twelve percent moisture content.
Water-based washes naturally cause the wood grain to raise, creating a rough, fuzzy texture across the face. Once the wood is bone dry, address this fuzz with a light hand sanding. Wrap 120-grit aluminum oxide sandpaper around a flexible foam sanding block that compresses into the curves of your profile. Sand strictly in the direction of the grain using light pressure. Follow this with a second pass using 150-grit paper. Avoid jumping to super-fine grits like 220 on bare pine unless you are applying an oil finish, as ultra-fine sanding polishes the wood pores closed and prevents penetrating stains or modern primers from anchoring properly.
Common Mistakes
- Applying high heat guns: Heating historic pine above 700 degrees Fahrenheit not only vaporizes toxic lead into breathable fumes, but it also boils the natural pitch and rosin pockets inside the pine, causing sticky sap to bleed across the surface.
- Dry scraping old boards: Attempting to chip away dry paint without chemical softening tears out long, jagged splinters of softwood grain that require extensive epoxy patching to repair.
- Skipping the plastic film cover: Leaving chemical stripper exposed to open air allows the volatile carrying agents to evaporate within forty-five minutes, leaving behind a gummy, hardened mess that is harder to scrape than the original paint.
- Sanding across the profile: Rubbing sandpaper sideways across molding contours rounds off sharp, authentic historical edges and leaves cross-grain scratches that show up vividly under clear finishes.
Practical Next Steps
Now that your baseboards are stripped, washed, and leveled out with medium sandpaper, inspect each piece under raking light. Position a bright work light at one end of the board, shining almost parallel to the surface. This side lighting instantly exposes any remaining paint flecks, gouges, or patches of raised grain that look invisible under direct overhead shop lights. Use a sharp chisel held flat to slice away any stubborn paint specks, followed by a light rub with a 150-grit sanding pad.
If you encounter splits near the nail holes, spread the cracks open slightly and work in a slow-setting polyvinyl acetate wood glue, then clamp the board across its width using scrap softwood blocks to protect the edges. For gouges or missing wood along the bottom skirt, mix pine sanding dust with clear wood glue or apply a two-part exterior wood epoxy, shaping it with a rasp once cured. If you plan to finish the boards with a clear coat or light stain, apply a coat of dewaxed shellac first. Dewaxed shellac seals any remaining resin pockets inside the pine, prevents blotchiness, and provides an ideal foundation for whatever traditional finish you choose next.