
Old linen shirts tend to fail in predictable places. The collar band frays, the elbows wear through to gossamer threads, or an errant cuff catches on a door latch and tears across the placket. Yet the back yoke and lower front panels often remain sturdy, tightly woven, and softer than any newly purchased yardage. Instead of discarding an otherwise durable garment or relegating it to the garage rag bucket, you can cut the sound sections into reusable food wraps that replace single-use plastic films in your kitchen.
Linen is uniquely suited for beeswax wraps. Its flax fibers are naturally hollow, which makes them absorbent and capable of taking up the melted wax mixture deep into the core of the yarn rather than simply letting it sit on the surface. When saturated with a balanced blend of beeswax, tree rosin, and jojoba oil, worn linen creates a supple, slightly tacky barrier that seals over bowls, folds neatly around cut cheese, and breathes enough to keep crusty sourdough from turning damp and rubbery.
Preparing and Cutting Fabric Squares
Before cutting into an old shirt, wash it on a warm cycle with a fragrance-free detergent to strip out any skin oils, laundry detergents, or fabric softeners that have settled into the weave. Fabric softeners coat cellulose fibers with a waxy silicone layer that repels hot beeswax, causing the mixture to bead up and flake away after a few days of refrigeration. If the shirt has been line-dried in the sun, run an iron over the panels with high steam to press out deep wrinkles and flatten the grainline.
Lay the deconstructed shirt flat on a cutting mat. Use a sharp pair of pinking shears rather than standard straight-blade scissors. The zig-zag pattern cut by pinking shears leaves the yarn ends unsupported at alternating angles, which prevents the linen from unraveling along the raw edges once the wax begins to wear down over several months of handling. If you only have a rotary cutter, install a wave or pinking blade to achieve the same edge stability.
Plan your cuts according to how you store food at home. It helps to keep three specific dimensions on hand to cover the most common bowls and ingredients:
- Small (18 cm by 18 cm): Sized for wrapping avocado halves, lemons, cut onions, and small condiment ramekins.
- Medium (26 cm by 26 cm): Fits cereal bowls, medium wedges of hard cheese, sandwich loaves, and melon quarters.
- Large (34 cm by 34 cm): Sized for standard mixing bowls, pie dishes, and half-loaves of country bread.
Inspect the cut panels against a window or bright desk lamp. Discard any sections where the weave shows uneven light filtering through, as localized thread thinning will absorb wax disproportionately, leading to stiff patches that crack when folded over a rim.
Measuring Wax, Rosin, and Jojoba Ratios
Pure beeswax creates a wrap that is stiff, slippery, and prone to flaking when pulled out of a cold refrigerator. To make a wrap that genuinely grips the rim of a ceramic bowl, you must incorporate pine rosin for stickiness and jojoba oil for low-temperature flexibility. Jojoba oil is technically a liquid plant wax, which means it will not oxidize, turn rancid, or develop a stale odor over time like olive, canola, or almond oils do.
The balance of these three ingredients determines whether your wrap clings securely or leaves a sticky residue on your hands and dinnerware. A ratio that accounts for the heavier density of worn linen consists of approximately 68 percent beeswax, 21 percent pine rosin, and 11 percent jojoba oil by weight. Weigh your ingredients on a digital kitchen scale down to the gram rather than using volume measurements, as rosin chunks and wax pellets settle with unpredictable voids.
| Ingredient | Proportion | Function in the Linen Wrap |
|---|---|---|
| Beeswax pellets (yellow or white) | 68% | Provides water resistance, structural body, and a clean base. |
| Pine rosin (gum rosin or colophony) | 21% | Adds natural resin tackiness so the wrap clings to glass and ceramic. |
| Pure cold-pressed jojoba oil | 11% | Lowers the brittle point of the wax; keeps folds flexible when cold. |
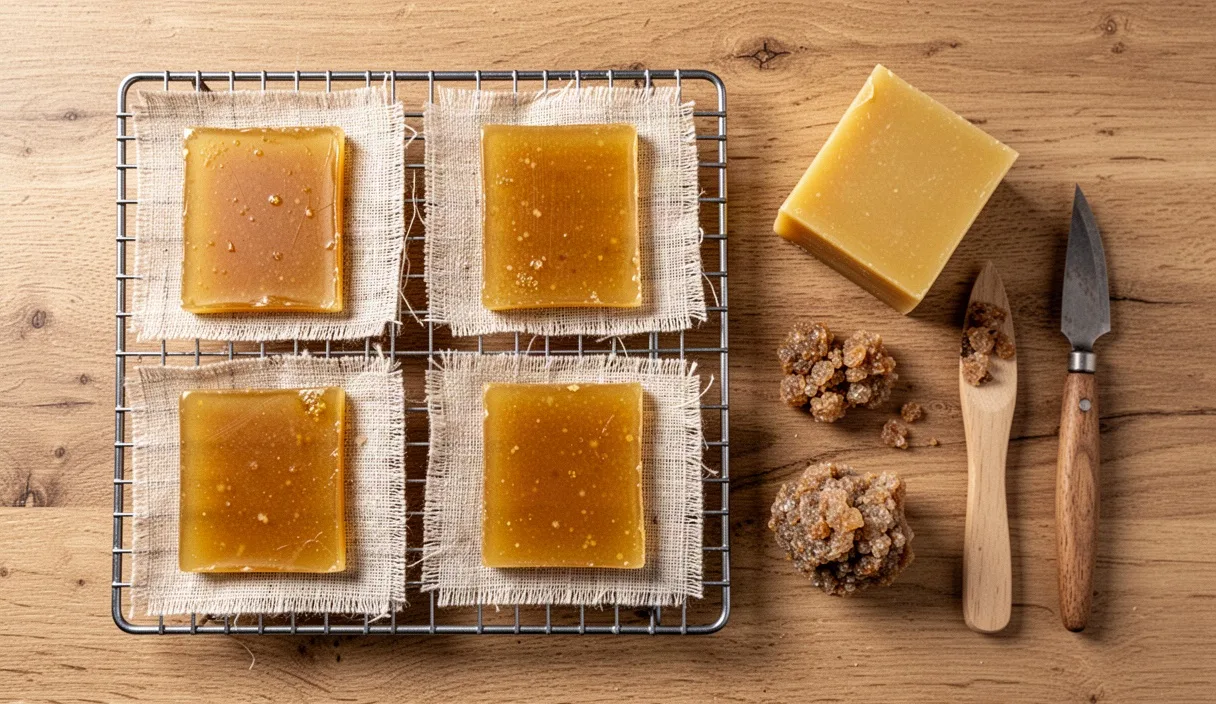
Pine rosin often arrives in hard, glassy amber rocks. If you attempt to melt whole chunks alongside your wax, the beeswax will overheat and degrade long before the rosin fully liquefies. Place the rosin chunks inside a heavy canvas bag or double-layered zip bag, wrap it in a dish towel, and crush it into a coarse sand with a wooden mallet or rolling pin. Fine particles melt evenly at modest temperatures without creating hot spots in the oven.
Melting the Blend Evenly in an Oven
Preheat your oven to 85 degrees Celsius (185 degrees Fahrenheit). This heat level sits comfortably above the melting point of beeswax, which liquefies around 63 degrees Celsius, and allows the pine rosin to dissolve without smoking or scorching. Line a flat aluminum baking sheet with unbleached parchment paper, ensuring the paper extends at least two centimeters beyond the edges of the sheet to catch any run-off. Never use waxed paper for this base, as the paraffin coating will melt and dilute your custom blend.
Lay one prepared linen square completely flat in the center of the parchment. Sprinkle the crushed rosin across the surface first, aiming for a light, loose scattering. Next, distribute the beeswax pellets across the linen, placing them roughly two centimeters apart from one another. Finally, use a glass dropper to distribute the jojoba oil across the square in small, controlled droplets. A 26-centimeter square usually requires between 14 and 18 grams of total mixture, depending on the thickness of the original linen weave.
Slide the baking sheet into the middle rack of the oven. Keep the oven light on and watch through the window. The melting process typically takes between four and seven minutes. You will see the wax turn clear and saturate the linen fibers, while the rosin powder softens and blends into the surrounding liquid. If your oven has a convection fan, turn it off to prevent air currents from blowing light rosin dust off the edges of the fabric before it melts.
Smoothing Out Dry Spots and Excess Pools
Once the mixture looks entirely liquefied, pull the baking sheet out and set it on a heat-resistant work surface. Work quickly before the wax begins to cool and turn cloudy, which happens within thirty to forty seconds. Using a flat, natural-bristle pastry brush or an inexpensive silicone basting brush, draw the melted wax from the center of the square out toward the edges and corners. Pay special attention to the pinked borders, which often remain dry if the wax was concentrated in the middle.
If you see pale, matte patches where the linen weave looks exposed, sweep small puddles of excess liquid directly over them. Linen has a thirstier weave than plain cotton, so it will drink up the blend quickly. Conversely, if you notice deep pools of clear liquid resting on top of the fabric that do not absorb after two light brush strokes, you have added too much wax. A heavy coat will crack and shed flakes every time you crease the wrap over a jar.
To lift excess wax from an oversaturated wrap, place a second, untreated linen square directly on top of the warm piece. Return the baking tray to the oven for two minutes so both layers bond, then pull the tray out and peel the two squares apart while hot. The top sheet will lift away half of the molten blend, creating an even distribution across both pieces with zero wasted resin. When the coat looks uniform and slightly satin in finish, take two corners between your fingertips, lift the fabric clear of the parchment, and hold it steady in the room air for twenty seconds. The wax sets almost instantly as its temperature drops below 55 degrees Celsius.
Curing and Washing the Finished Covers
Freshly dipped wraps should hang freely for 36 to 48 hours before being put into service in the pantry or refrigerator. Clip them to a wooden clothes drying rack or string them across a well-ventilated room using wooden clothespins. This curing window allows the volatile aromatic terpenes in the pine rosin to disperse completely, leaving behind only a faint, clean honey fragrance that will not transfer flavor into delicate foods like soft cheeses or cut fruit.
The working lifespan of a linen wrap depends directly on how you wash it. Heat is the enemy of the wax barrier. Never rinse these covers under hot water, never run them through a dishwasher, and never use them to cover steaming leftovers directly from the stove. Wash them under cool or lukewarm running tap water using your hands or a soft cellulose sponge. If you have wrapped something oily, use a few drops of mild, alcohol-free dish soap, lather gently, and rinse clean.
Dry the wraps flat on a clean dish towel or hang them over a drying rack out of direct sunlight. Direct UV exposure and radiator heat will soften the beeswax, cause the rosin to migrate, and leave the linen brittle over time. Store the clean, dry wraps flat in a shallow drawer or rolled together inside a wide glass jar where they will not be crushed under heavy pans.
Common Mistakes
- Skipping the Rosin: Using only pure beeswax yields a wrap that pops open instead of clinging. Rosin gives the cloth its adhesive properties.
- Washing in Warm Water: Water above 45 degrees Celsius softens the wax matrix, stripping the mixture out of the linen and down the drain.
- Wrapping Raw Meat: Because these wraps cannot be sanitized with boiling water or harsh chlorine bleaches, avoid wrapping raw poultry, fish, or beef directly in them.
- Overheating in the Oven: Temperatures above 100 degrees Celsius will scorch the beeswax, causing it to darken, smoke, and take on an acrid smell that ruins the fabric.
- Using Synthetic Thread: If you hemmed the edges instead of pinking them, polyester sewing thread will repel the wax mixture, leaving loose, uncoated loops that fray.
Next Steps for Your Kitchen Linens
Begin by sorting through your collection of retired shirts. Pure linen tags are the prime candidates, but linen-cotton blends containing at least 60 percent flax fiber also perform admirably with this exact recipe. Sort the cut panels by size, batch your wax components in small glass jars, and prepare three or four wraps during a single afternoon session to make the most of an active, warm oven.
After eight to twelve months of regular kitchen duty, your wraps will develop small creases and faint chalky lines where the wax has thinned from repeated folding. When this happens, do not throw them away. Simply place the worn wrap back on a parchment-lined tray, sprinkle a few grams of your pre-mixed rosin, wax, and jojoba pellets over the crease lines, and reheat it in the oven for five minutes. The coating will flow, redistribute, and seal the linen fibers for another year of daily service.