
Heavy wool socks live a hard life inside boots, where friction against stiff leather heels and coarse insoles will grind down even the sturdiest spun plies. When a thin patch or an outright void opens at the heel or beneath the ball of the foot, the first instinct is often to reach for standard embroidery floss or lightweight sewing thread. That approach fails quickly under the weight of winter boots, leaving a wire-thin patch that bites into your heel while pulling the surrounding wool loops apart. A repair on heavy boot socks must match the original fabric in weight, loft, and flexibility if you want it to survive a season of walking.
Darning is essentially miniature weaving executed on the fly, supported by the stable architecture of the surrounding knitwear. When done properly on heavy ragg socks, mountaineering socks, or hand-knit winter woolens, a woven darn does not create an irritating lump. Instead, it forms an integrated pad of fresh fiber that mats down gently into the original fabric through friction and warmth. You do not need an antique wooden toolkit or hours of silent contemplation to achieve this. With a blunt needle, an appropriate ball of reinforced wool, and an understanding of tension, you can rebuild the base of a sock so securely that the rest of the knit will wear out before the patch gives way.
Choosing the Right Mending Yarn and Gauge
The cardinal rule of darning heavy footwear is to match fiber to fiber while accounting for foot friction. Never use pure cotton embroidery floss or craft thread on thick wool socks. Cotton lacks elasticity, holds dampness against the skin, and acts like a cheese wire under foot pressure, cutting straight through softer wool fibers as you stride. Your repair yarn should consist primarily of wool for warmth and resilience, preferably blended with a modest portion of nylon or polyamide for abrasion resistance. A yarn containing three parts wool to one part nylon mimics the durable composition of commercial boot socks.
Gauge matching prevents buckling and tight spots. If you use yarn that is substantially thinner than the original sock knit, you will be forced to weave dozens of dense passes, creating a stiff, board-like patch. Conversely, yarn that is too heavy will leave cavernous gaps between strands, allowing boot grit to work in and abrade the broken loops. For commercial boot socks knit on medium gauges, a fingering-weight or light sport-weight mending yarn split into plies or doubled provides the right balance. For chunky, hand-knit socks knit on four-millimeter needles, use an intact DK-weight or worsted-weight wool.
| Sock Type and Fabric Thickness | Recommended Mending Yarn Weight | Needle Size (Tapestry/Ballpoint) | Fiber Composition |
|---|---|---|---|
| Heavy commercial boot socks (medium knit) | Fingering weight (4-ply), or two strands 2-ply | Size 20 to 22 blunt needle | Wool blended with nylon |
| Chunky hand-knit ragg wool socks | Sport weight or DK weight wool | Size 16 to 18 tapestry needle | Spun sheep wool or wool-mohair blend |
| Dense felted expedition socks | Fine crewel wool worked in three strands | Size 18 chenille or ballpoint | Untreated wool with high natural crimp |
| Fine-gauge dress or merino boot socks | Dedicated 2-ply darning wool | Size 24 tapestry needle | Merino wool reinforced with synthetic core |
If you have leftover yarn from the original skein used to knit the socks, check whether it carries synthetic reinforcement. Hand-knitting yarns labeled as non-reinforced single plies or fragile roving will break down quickly under heel pressure. In those cases, you can hold the original yarn together with a strand of fine polyester sewing thread or specialized nylon darning filament. This reinforcement hidden inside the woolen core supplies tensile strength while the wool provides the necessary cushion against the boot.
Setting Up the Darning Mushroom
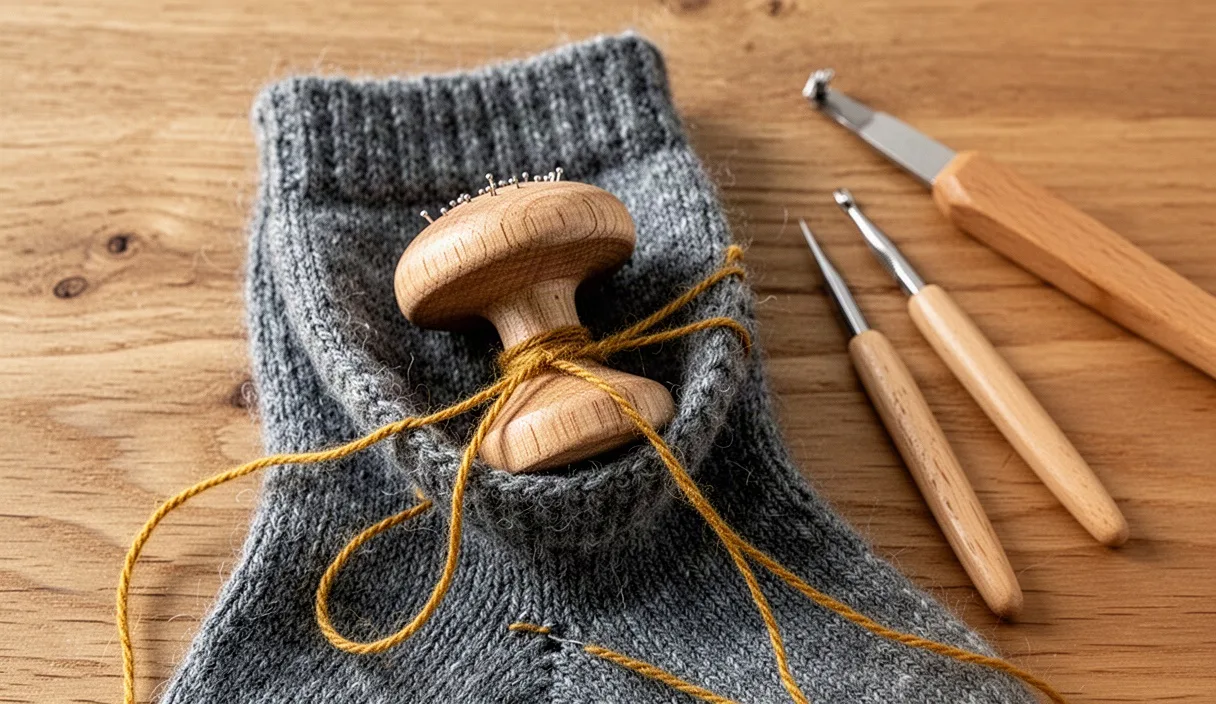
Darning requires consistent tension across the damaged zone, which is nearly impossible to maintain while holding floppy knit fabric between your fingers. A darning mushroom provides a domed wooden surface that mimics the curved contours of a human heel or toe box. If you do not own a wooden mushroom, a smooth river rock, an old burned-out incandescent light bulb, or an ordinary naval orange from the fruit bowl will work surprisingly well. The goal is to provide a rigid, curved backing that keeps the sock fabric naturally supported without stretching it out of shape.
Slip the mushroom into the sock until the dome sits directly beneath the hole. Center the thinned area on the crown of the dome. Many menders make the mistake of pulling the sock taut over the mushroom until the fabric groans and the stitches open wide. Stretching the sock while mounting guarantees that once you finish the darn and remove the form, the knit will snap back, causing your patch to buckle into an unusable, wrinkled pocket. The sock should rest flush against the wood, smooth and free of wrinkles, but with zero tension applied to the surrounding loops.
Secure the sock around the stem of the mushroom using a wide rubber band or a piece of soft cotton twill tape tied in a slipknot. Position this band four or five inches below the working area so that it does not pull directly on the hole. Inspect the fabric under direct light. Identify not just the visible hole, but the wider halo of worn, shiny, or semitransparent stitches surrounding it. Your repair must extend across this weak perimeter. Anchoring fresh yarn to fragile, half-worn stitches will result in a brand-new hole appearing right alongside your repair after one weekend on the trail.
Laying the Warp Threads Across the Hole
Every woven darn relies on two components: the vertical warp threads that bridge the gap, and the horizontal weft threads that weave through them. Thread a blunt tapestry needle with an arm-length piece of your chosen mending yarn. A blunt tip is critical because it slides between knit stitches without piercing or splitting the original plies. Begin laying your anchor rows in solid, unworn fabric at least four rows above the thinned boundary.
Secure the yarn using small running stitches worked parallel to the vertical columns of the knit (the wales). Do not knot the yarn. Work down toward the hole, passing through the center of each knit stitch. When your needle reaches the edge of the void, leap across the gap to the opposite side, inserting the needle into solid knit four rows below the hole. Pull the yarn until it lies flat across the opening. It must match the natural tension of the sock fabric: not sagging downward into the hole, yet not pulled tight enough to draw the opposing edges together.
- Establish the boundary: Work four running stitches down an intact vertical wale, three stitches to the left of the worn perimeter.
- Span the gap: Carry the yarn straight across the void to the opposing side, keeping the thread resting gently against the surface of the mushroom.
- Anchor the lower edge: Take four vertical running stitches down the corresponding intact wale below the hole.
- Turn and reverse: Make a tiny horizontal turn by sliding your needle over to the adjacent wale, then run four stitches back up toward the hole.
- Span in reverse: Carry the yarn back across the opening, maintaining an even space of roughly one millimeter between warp strands.
- Catch free loops: Whenever your needle passes an unraveled loop of the original knit hanging at the edge of the hole, pass your needle directly through that open loop to trap it in the warp grid.
Continue this back-and-forth journey until the entire hole and the surrounding fragile halo are covered with a parallel grid of vertical warp threads. Leave a tiny loop of slack at each turn when you reverse direction on the solid fabric. Wool expands and contracts when washed; tiny loops at the perimeter serve as expansion joints, preventing the patch from puckering your sock when the garment enters warm water.
Weaving the Weft for Maximum Cushion
With the warp in place, you are ready to construct the weft, which supplies the structural density and cushion that will bear your weight. Turn the darning mushroom ninety degrees so that the warp threads now run horizontally in front of you. You will weave the weft perpendicular to the warp, working across the vertical columns of the sock knit. Begin anchoring the weft in healthy fabric four stitches beyond the edge of the warp array using running stitches, just as you did at the start.
When you reach the warp field, begin an under-and-over sequence with your blunt needle. Push the needle under the first warp thread, over the second, under the third, and continue across the entire array. Pull the thread through gently until it sits without tension. As you emerge on the far side, anchor the pass by weaving through three or four healthy knit stitches in the sock wall. Turn around, enter the adjacent knit row, and weave back across the warp in the opposite pattern: go over the threads you previously went under, and under the threads you went over.
Packing the weft correctly determines whether your patch feels like an irritating screen door or a soft, dense pad underfoot. After completing each pass across the warp, turn the blunt eye of your needle sideways and use it as a reed to pack the newly laid weft thread back down against its neighbor. Push firmly but gently. You want a dense weave that conceals the warp, mimicking the loft of original knit fabric. If you pack too loosely, your toes will snag the loose strands when you pull the sock on. If you pull the horizontal threads too tight at the turns, you will pinch the sides of the hole inward, turning the heel of your sock into an hourglass.
For high-wear heel zones, you can use a twill weave rather than a basic plain weave. A twill pattern works by stepping over two warp strands and under one on the first row, then shifting that sequence by one strand on each subsequent row. This creates diagonal ridges across the darn. Twill weave creates a thicker, more supple fabric with greater impact absorption inside a boot, though it requires slightly more concentration to maintain the sequence across a wide heel gap.
Anchoring Yarn Tails Without Lumpy Knots
The single greatest error in sock repair is tying off threads with hard knots. A knot placed beneath the heel or under the metatarsals turns into a brutal point of friction against your skin after three miles on the trail, often causing the exact blister you were trying to prevent. Fortunately, the natural felting action of animal hair allows you to anchor your threads securely using friction alone.
When you reach the end of your weft weaving, guide your needle away from the woven field into healthy sock fabric. Execute four small running stitches through the top purl bumps of the sock loops, moving along the grain of the knit. Reverse your needle path, skipping one strand to lock the turn, and run the thread back through the centers of those same stitches for three rows. This double-back path locks the yarn inside the wool structure. Gently stretch the sock over your knuckle to ensure the tail does not pull out under load.
To finish the starting and ending tails:
- Leave an exposed tail roughly two inches long on the interior or exterior surface while finishing the darn.
- Thread the tail onto your needle and skim it through the middle plies of the original knit loops for an inch, keeping the needle within the thickness of the wool fabric.
- Bring the needle out to the inside of the sock, pull the yarn lightly, and clip the thread flush with the fabric surface.
- When the sock relaxes, the clipped tip will snap back inside the thickness of the knit, completely buried.
- After the first wash, the rough scales of the mending yarn will lock together with the surrounding fibers, making the cut ends permanent.
Common Mistakes to Avoid
Even an experienced hand can produce an uncomfortable darn if a few textile realities are ignored. Review these frequent pitfalls before beginning your work:
- Stopping the repair at the visible edge: Fabric wears thin before it tears open. If you do not anchor your warp and weft rows at least four stitches deep into thick, opaque fabric, your patch will rip free from the sock wall within days.
- Over-tensioning the turns: Pulling hard on the yarn as you reverse directions pulls the repair inward, causing the surrounding sock to pucker and bunch beneath your foot. Maintain relaxed, steady tension with a micro-loop at every turn.
- Using sharp embroidery needles: Sharp tips pierce the strands of your warp threads and split the sock yarns, which frays the fiber and makes clean, uniform over-under weaving nearly impossible. Always use a round-tipped tapestry or ballpoint needle.
- Ignoring live, unraveling loops: If a severed knit stitch is left dangling at the top or bottom of a void, it will continue to run upward like a ladder in a pair of tights. Every free loop must be caught on a needle pass and anchored into the warp.
Next Steps for Heavy Sock Care
Once you detach the sock from the darning mushroom, the patch might look somewhat distinct and geometric compared to the surrounding knit. The final step is wet finishing, which transforms the repair into an integrated component of the garment. Submerge the mended sock in lukewarm water with a drop of gentle wool wash or mild shampoo. Do not wring or twist the damp fabric. Press the water out between two clean towels, gently shape the heel and toe by hand, and lay the socks flat on a drying rack away from direct heat sources.
The moisture and drying cycle prompt the fibers in your mending yarn to bloom, filling in tiny interstitial gaps and evening out the weave tension. Moving forward, make a habit of holding your heavy socks up to a window or bright lamp every few weeks after laundering. Look for thin spots where light passes through freely. Laying down a few rows of duplicate stitch or a light surface darn on thinned areas before an actual void develops requires a third of the time and preserves the original structural integrity of your boots' best companions.