
Denim repairs usually announce themselves in two places: the knee, where repetitive bending pulls the diagonal twill apart, and the pocket edge, where phones, keys, and hands wear through the outer indigo layer. Throwing away a pair of jeans that fits well through the hips simply because a hole has broken through the knee makes little sense. Sashiko, a Japanese functional embroidery tradition developed during the Edo era, offers an enduring way to reinforce these high-stress zones while visibly honoring the work the garment has already done.
Rather than hiding the rip behind an iron-on synthetic patch that peels away after two cycles in the wash, sashiko relies on structural stitching that binds a backing fabric directly to the base denim. The process requires very little specialized equipment, just basic geometry, strong cotton thread, a sturdy needle, and a scrap of woven fabric. It turns an afternoon of quiet needlework into years of extended garment life, producing a repair that bends naturally with your joint instead of buckling like cardboard.
Selecting Backing Cloth from Scrap Bins
The foundation of any lasting denim repair is the backing cloth, which takes on the tension when you kneel or sit. A common impulse is to match heavy denim with equally heavy denim scrap, but stacking two layers of 14-ounce raw twill creates a stiff, stubborn block that abrades your kneecap and strains the surrounding stitches. Instead, aim for a scrap fabric weighing between 5 and 8 ounces per square yard. This provides tensile support while remaining pliable enough to move with the body.
Woven cottons, linens, and blended scraps from old shirts or tote bags serve this purpose admirably. Avoid stretchy materials like jersey knit or elastane blends. A patch needs dimensional stability; if the patch stretches while the denim does not, the repair will distort within an hour of wear. Before cutting your patch, inspect the scrap for grainline direction. You should align the warp threads of your backing patch with the warp threads of your jeans so both layers give and resist tension along the same axes.
| Backing Material | Approximate Weight | Flexibility | Best Placement |
|---|---|---|---|
| Cotton Chambray | 4.5 to 5.5 oz | High | Front and rear pockets |
| Vintage Linen Scrap | 6 to 7 oz | Moderate | Knee reinforcement |
| Medium Cotton Twill | 7 to 8.5 oz | Moderate | High-friction knee blows |
| Quilting Cotton | 4 to 4.5 oz | High | Light pocket bags only |
Cut the backing cloth so it extends at least 2.5 centimeters, or roughly one inch, past the frayed edges of the hole in every direction. Damaged denim always has an unseen halo of weakened yarn surrounding the visible tear. Sewing solely into this weakened perimeter ensures that the patch will rip free the next time you squat. Cutting an ample perimeter allows your stitches to anchor firmly into healthy, dense fabric.
Basting the Reinforcement Layer
Securing the patch in position before running structural stitches is critical. If the backing moves even a fraction of an inch during stitching, you will end up with puckers on the outside face of the leg. Turn the jeans inside out and smooth the leg across a flat work surface. Center the backing fabric over the damaged zone, right side of the patch facing down against the wrong side of the denim.
Pins are useful for initial placement, but they catch thread tails and warp the cloth when you slide the trouser leg over your hand. Instead, use a temporary running baste worked in a bright, contrasting sewing thread that will be easy to pull out later. Sew long basting stitches around the outer border of the patch, roughly 1 centimeter inside its raw edge, followed by an inner spiral or a cross pattern through the middle.
- Knee placement: Slip a small cutting mat, wooden tailor board, or stiff piece of cardboard inside the trouser leg before basting. This prevents you from accidentally stitching the front panel of the jeans to the back panel, which is an error that will make you laugh briefly and then sigh deeply.
- Pocket placement: When mending near or through a pocket, separate the pocket bag from the outer denim shell. Baste the backing patch directly to the underside of the outer denim layer, taking care not to seal the pocket opening shut unless you intend to decommission that pocket permanently.
- Edge trimming: Once basted, turn the garment right side out and check the visible frayed threads. Trim loose, stringy fibers that exceed 1.5 centimeters in length, but leave the dense, fuzzy frayed margin intact. That fuzz will be trapped under your sashiko stitches, adding extra density to the worn zone.
Marking Grids with Tailor Chalk
Sashiko patterns derive their quiet beauty from regular, rhythmic spacing. While veteran stitchers sometimes eyeball their lines, working on uneven, stretchy knee areas without guides almost always results in drift. Marking a simple grid directly onto the face of the denim ensures that your stitches remain parallel and your spacing consistent across the repair.
Use a water-soluble fabric pencil, a sharp piece of tailor chalk, or a ceramic marking pen. Test the marker on an interior seam allowance first to confirm that it washes out with cold water. Avoid ballpoint pens, standard graphite pencils, or wax markers, which can bond permanently with indigo dye or leave greasy residues when ironed. For dark indigo denim, white or yellow chalk yields the cleanest contrast; for faded light-wash jeans, a soft blue wash-away pencil works best.
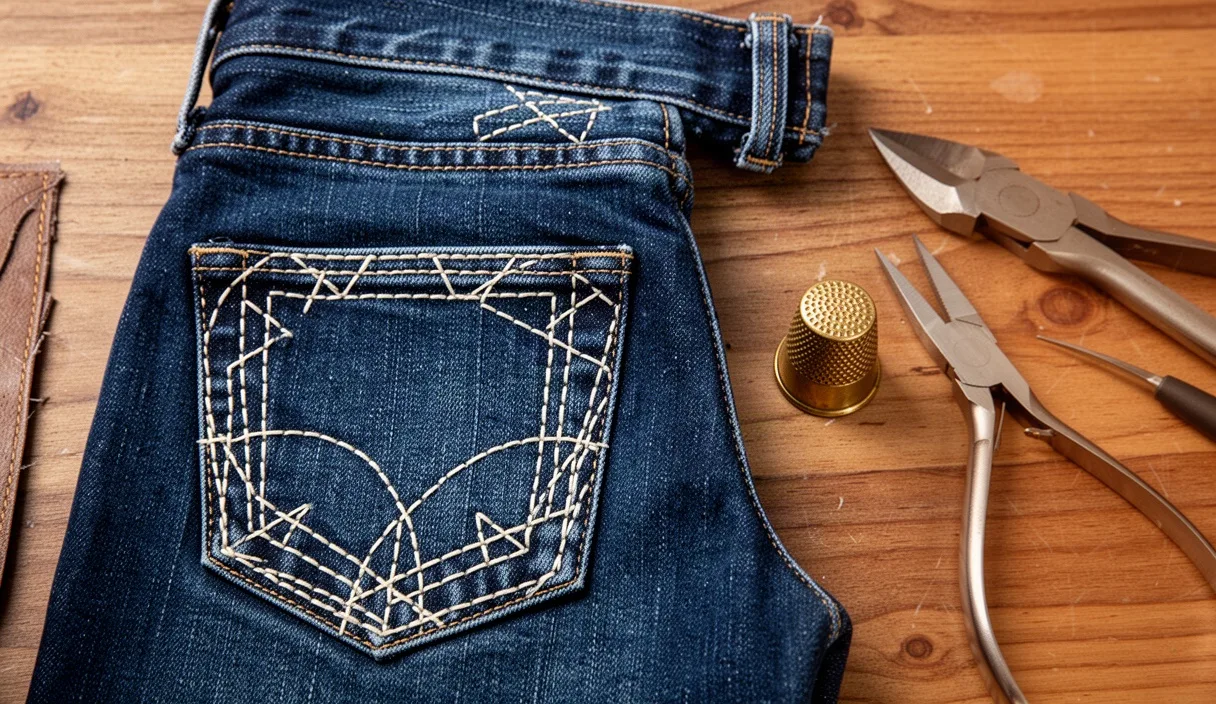
Lay an acrylic quilting ruler across the right side of the garment. Align the ruler with the straight grain of the denim, using the visible twill lines as your horizontal and vertical guides. Draw parallel lines 5 millimeters apart across the entire area requiring reinforcement. If you plan to stitch a cross-hatch or grid-based pattern like juji zashi, draft a perpendicular set of lines at the same 5-millimeter interval to create a clean grid of small squares.
If you prefer a simpler, linear texture, horizontal lines spaced 6 to 7 millimeters apart will give you an authentic repair without over-complicating the layout. Keep your chalk lines thin and sharp. Broad chalk marks make needle entry points ambiguous, which can throw off your stitch counts across wide patches.
Executing the Running Stitch Rhythm
Traditional sashiko relies on a distinct tool kit. Use specialized sashiko thread, which is a strong, non-mercerized matte cotton thread made of multiple fine plies twisted together. Unlike embroidery floss, it cannot be split into individual strands; you use it whole. Sashiko needles are also distinct: long, rigid, with a small, round eye that slides through thick layers without widening the weave holes excessively.
The core technique of sashiko is unshin, a continuous needle motion where the fabric is gathered onto the needle in small folds rather than pushed through one stitch at a time. Fitted with a palm thimble, a metal or leather disc sitting on the pad of your middle finger, you push the needle eye forward while your non-dominant hand pleats the denim onto the needle point.
- Thread your needle with a comfortable length of sashiko cord, ideally the distance from your fingertips to your elbow. A longer strand tangles and frays from repeated passes through the tough twill.
- Begin stitching from one corner of your marked grid, starting slightly outside the patch boundary. Bring the needle up from the inside of the garment, leaving a 2.5-centimeter thread tail on the inside.
- Rock the needle tip up and down along your marked chalk line, loading five to eight stitches onto the needle shaft before drawing the thread through. Keep your stitches slightly longer on top of the fabric than on the underside, aiming for a visual ratio of roughly three parts top thread to two parts gap.
- Draw the needle through the bunched fabric smoothly. Before pulling the thread taut, smooth the denim flat with your thumb and fingers. sashiko thread should sit comfortably on the denim surface without pulling the cloth into ripples or puckers.
- When reaching the edge of a line, pivot to the next parallel row. Leave a small, relaxed loop of thread on the underside when making turns; this slack accommodates natural fabric movement during washing and prevents corner puckering.
Pressing and Securing the Thread Ends
Sashiko rarely uses large, hard knots on the interior. In high-friction spots like knees, a bulky knot will rub against your skin, while around pockets, it can catch on pocket contents. Instead, anchor your thread ends using overlapping backstitches on the wrong side of the garment, tucked into the backing fabric layer.
To finish a run, weave the needle backward through the underside loops of the last three stitches, draw the thread snug, and trim the tail to roughly 1 centimeter. The friction of the non-mercerized cotton thread rubbing against the backing fabric keeps the end locked securely in place. Alternatively, work three tiny running stitches along the edge of the patch beneath the denim layer where they remain hidden from the outside.
Once all the functional stitches are complete and thread ends trimmed, remove your initial basting threads with a seam ripper or snips. Take the garment to an ironing board for pressing. A dry iron can crush the raised texture of sashiko stitches, so use plenty of steam and a damp pressing cloth. Place the pressing cloth over the repair and hold the iron firmly in place for eight to ten seconds without sliding it back and forth. The moisture and heat swell the cotton fibers of both the jeans and the thread, locking the stitches into the twill structure and washing away residual chalk lines.
Common Mistakes to Avoid
The most frequent failure in sashiko knee repair is over-tensioning the thread. When pulling each line of running stitches through, pulling even slightly too hard creates permanent gathers that give the knee a puckered appearance. Always flatten the panel completely along your work surface before completing the pass, and leave deliberate slack at every row turn.
Another pitfall is using standard six-strand embroidery floss. While embroidery floss is easy to find, it lacks the tight twist and high tensile strength of authentic sashiko thread. When subjected to the daily abrasion of a denim knee, embroidery floss shreds within weeks. If dedicated sashiko thread is unavailable, a size 8 pearl cotton thread is a suitable substitute.
Finally, avoid stitching directly through the back of a front pocket bag. If your knee blowout extends upward or you are repairing the coin pocket area, take time to reach inside and pin the pocket lining safely out of the needle path. Sewing pocket bags shut by accident is an irritating mistake that requires undoing dozens of careful stitches.
Next Steps for Your Repaired Denim
After your repair is pressed and dry, put the jeans on and move around. Bend your knees, crouch, and place your hands in your pockets to test the tension. You should feel comfortable support over the repaired area without any sharp pulling along the edges of the backing cloth. If an area feels tight, gentle manual stretching of the fabric while damp will help the stitches settle into their final placement.
Going forward, wash your repaired jeans inside out on a gentle cycle in cool water, and air-dry them whenever possible. Sashiko stitching thrives under normal laundry care, but high-heat tumble dryers can cause scrap backing fabrics and heavy denim shells to shrink at different rates, introducing unwanted puckers. Inspect your stitching every few months; if high-wear spots begin to fray, you can easily add a fresh layer of running stitches directly over the old ones, building a durable, evolving history right into your denim.