
A loaf of country sourdough usually does not go bad in the manner of commercial sandwich bread. Instead of turning green overnight, an artisanal loaf loses its moisture slowly, transforming over four or five days from an open, tender crumb into something resembling a river stone. Many bakers discard these rock-hard ends, assuming that once the bread can no longer be sliced with a serrated knife, its culinary life is over. That waste is unnecessary, because traditional sourdough carries an acidity and an open structure that make it uniquely suited to secondary cooking.
Before throwing a dry heel into the compost bin, it helps to understand the difference between retrogradation, which is the chemical recrystallization of starch as bread stales, and biological decay. True sourdough contains lactic and acetic acids that delay bacterial growth, giving you a wider window of safety than yeasted breads enjoy. With a few basic techniques, including wet-heat regeneration, dry pan-toasting, and low-temperature dehydration, you can turn forgotten crusts into stable pantry staples, crisp additions to greens, or thickeners for rich winter broths.
Testing for True Dryness Versus Spoilage
Dryness is mechanical; spoilage is biological. Stale sourdough simply lacks water. When water leaves the crumb, amylose and amylopectin molecules realign and stiffen, producing a firm, chalky mouthfeel. This bread is safe to eat and structurally sound for cooking. Spoilage, on the other hand, means mold spores or unwanted bacteria have colonized the bread. Before attempting to salvage a loaf, inspect it closely under good light.
Look first at the crevices and interior air pockets. Mold in sourdough often starts in the dampest central pockets rather than on the dry outer crust. It appears as faint white webbing, dusty green patches, or pin-sized black dots. If you see white fuzz, do not mistake it for flour dusting from the banneton basket. Banneton flour is powdery, matte, and brushes away clean. Mold clings to the crumb walls and has a distinct, three-dimensional thread structure. If any mold is visible, discard the entire loaf; fungal hyphae run deep through porous bread long before fruiting bodies show on the surface.
Smell is the second diagnostic tool. Sourdough naturally smells tangy, yeasty, or slightly fruity. It should never smell musty, damp like a basement, or chemical like acetone. In warm kitchens with high humidity, loaves can also fall victim to rope spoilage, caused by Bacillus species. Bread with rope spoilage develops a faint odor of rotting cantaloupe, and the crumb turns sticky, stringy, and brown. Such bread must be thrown away immediately, and your breadbox should be scrubbed with hot soapy water and vinegar.
| Inspection Factor | Safe, Stale Bread | Spoiled Bread (Discard) |
|---|---|---|
| Crumb feel | Brittle, chalky, hard, or resistant to bending | Spongy-damp, gummy, slick, or sticky to the touch |
| Visual signs | Pale interior, dry crust, flat flour dusting | Webbing in cavities, blue-green dots, pinkish streaks |
| Aroma profile | Clean acidity, toasted grain, faint lactic tang | Musty cellar, damp paper, rotten melon, or ammonia |
| Crust response | Cracks or shatters under blunt pressure | Pliable without snapping, soft damp spots |
The Water Bath Oven Refresh Method
If your sourdough has no signs of mold and is merely three or four days old, you can restore its interior crumb and crisp crust using heat and water. This method sounds counterintuitive to home bakers who have been taught to keep bread dry, but it relies on basic starch chemistry. Immersing or dousing the bread hydrates the outer starch layer, while heat inside the oven gelatinizes those starches again, pulling trapped steam back into the center of the crumb.
Preheat your oven to 190 degrees Celsius (375 degrees Fahrenheit). Take the whole stale loaf, or a large cut half-loaf, and hold it directly under a running tap of cold water. Do not be timid: let the water wet every square centimeter of the crust. If the bread is exceptionally hard, let the stream run over it for five to eight seconds. If you are refreshing a cut loaf with an exposed crumb face, direct the water primarily at the crust, letting only a light splash hit the open face to prevent turning the crumb into a wet paste.
Place the wet bread directly onto the middle oven rack without a sheet pan. Bake according to the size of the piece:
- Small rolls or quarters: 7 to 9 minutes.
- Half-loaves (roughly 400 grams): 10 to 14 minutes.
- Full batards or boules (800 grams or larger): 15 to 20 minutes.
Check the bread by pressing the sides with an oven mitt. The crust should feel completely firm and crisp, not spongy, and it should produce a hollow sound when tapped on the base. Remove the loaf and set it on a wire cooling rack. Let it rest for at least ten minutes before cutting. This rest allows the steam inside to settle back into the starches; slicing into it right out of the oven releases that steam, causing the interior to collapse into gummy dough. A refreshed loaf should be consumed within six hours, as it will dry out faster the second time around.
Grating and Toasting Seasoned Breadcrumbs
Loaves that are past the point of an oven refresh make durable breadcrumbs. Unlike store-bought crumbs, which are often uniform and powdery, sourdough crumbs possess jagged edges, blisters, and an uneven mix of coarse crunch and fine meal. They hold up under heat without dissolving into mush.
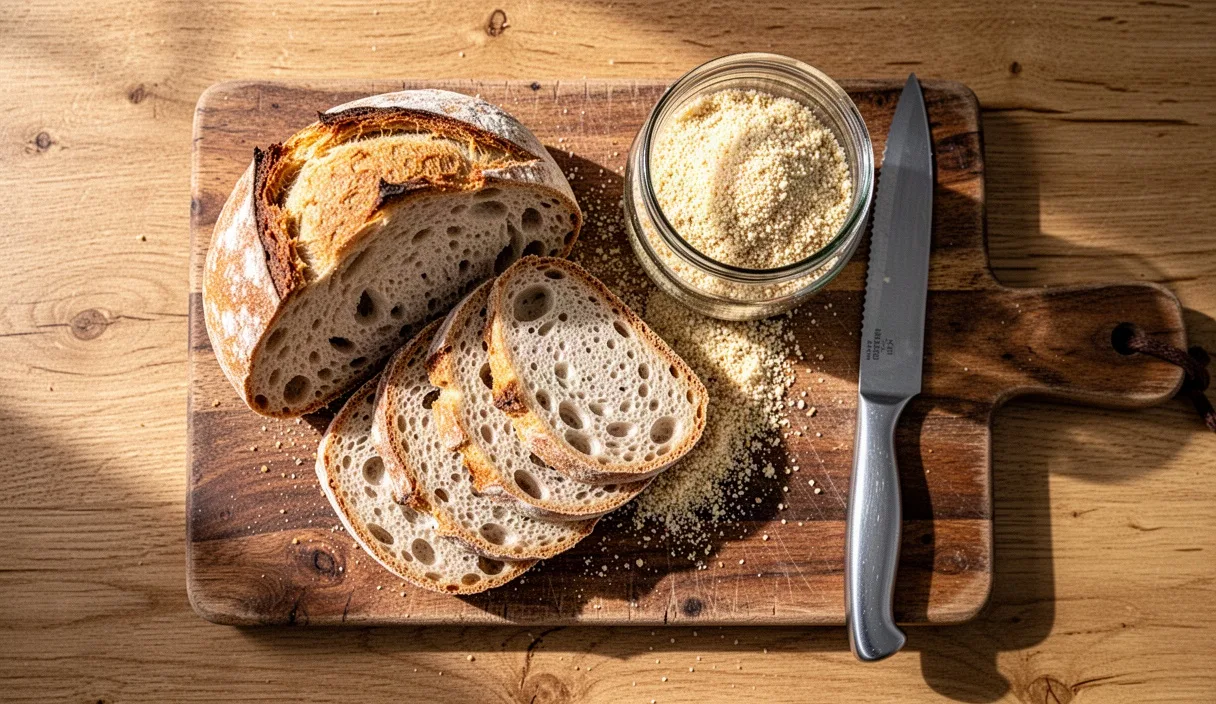
If your bread is hard but still yields slightly to a heavy serrated knife, cut it into small cubes and pulse them in a food processor until you reach your desired grain size. If the bread is so hard it risks damaging the processor blade, use the coarse side of a metal box grater. Hold the crust firmly and grate downward; your knuckles will thank you for taking your time. Sifting the resulting batch through a coarse mesh colander separates fine dusting crumbs, which work well for binding meatballs, from the irregular crumbs suited for crisp toppings.
To toast and season the crumbs, follow these steps:
- Spread the grated crumbs across a rimmed baking sheet in a layer no thicker than one centimeter.
- Bake at 150 degrees Celsius (300 degrees Fahrenheit) for 12 minutes, then stir thoroughly with a metal spatula to bring the bottom crumbs to the surface.
- Drizzle two tablespoons of olive oil per 200 grams of crumbs, tossing until the oil is evenly distributed.
- Add half a teaspoon of fine sea salt, a pinch of cracked black pepper, and dried herbs such as thyme, oregano, or rosemary. Avoid fresh garlic or fresh herbs at this stage, as their moisture can cause mold during storage.
- Return the tray to the oven for another 8 to 12 minutes, checking often until the entire batch turns a warm, golden amber color.
Let the crumbs cool completely on the tray. If you store them while even slightly warm, residual condensation will soften them and invite mold. Once cold, transfer them to a clean, airtight glass jar. Store them in a dark cupboard for up to four weeks, or keep them in the freezer for up to six months without loss of texture.
Classic Bread Soups and Pan-Fried Croutons
Southern European cooking developed dozens of recipes designed specifically around stale levain. The robust structure of naturally leavened bread allows it to absorb hot liquids without disintegrating. Two of the most reliable preparations are Tuscan ribollita style bread soups and skillet croutons.
For a fast skillet bread soup, tear roughly 250 grams of dry sourdough into bite-sized chunks. In a wide pot, cook half a diced yellow onion, two minced garlic cloves, and a rib of chopped celery in three tablespoons of olive oil over medium heat until soft. Add one can of whole peeled plum tomatoes, crushed by hand, along with 500 milliliters of unsalted vegetable or chicken broth. Bring the liquid to a simmer, season with salt and pepper, and stir in your dry bread pieces. Lower the heat to low, cover the pot, and cook for 15 minutes. Stir vigorously with a wooden spoon: the bread should break down into a thick, velvety porridge, rich with acidity and olive oil. Finish with a drizzle of raw olive oil and freshly grated hard cheese.
If you prefer dry crunch over soft texture, skillet croutons offer immediate utility:
- The cut: Cut stale bread into two-centimeter cubes using a serrated knife. Uneven, torn pieces yield more crunchy edges than neat cubes.
- The fat: Heat three tablespoons of high-smoke fat in a heavy cast-iron skillet over medium heat. A mix of equal parts olive oil and unsalted butter produces balanced browning and rich flavor. Bacon grease also works exceptionally well.
- The cook: Add the bread cubes in a single layer. Do not crowd the pan; cook in batches if necessary. Let them sit undisturbed for two minutes so the bread drinks in the fat and develops a deep brown crust on the bottom face.
- The toss: Turn the cubes with tongs or shake the pan, cooking for another four to six minutes until all sides are golden brown and sound crisp when shaken against the iron.
- The finish: Remove from heat, immediately sprinkle with flaky sea salt and finely chopped garlic, and toss for 30 seconds off the flame so the residual heat cooks the garlic without burning it.
These croutons will stay crisp in a paper-lined bowl for up to three days, ready to be dropped into thick chowders or tossed through leafy greens with an acidic vinaigrette.
Drying and Storing Leftovers for Winter Stocks
When you have small pieces, crust trimmings, or half-slices that you cannot use right away, do not let them linger in the bread box until they spoil. You can preserve these scraps indefinitely by fully dehydrating them into shelf-stable soup bread, known traditionally as rusks or hard bread.
Gather your accumulated pieces and cut or snap them into roughly uniform chunks, about the size of a walnut. Spread them evenly across a wire rack set inside a baking sheet. Place them in an oven heated to 95 degrees Celsius (200 degrees Fahrenheit). If your oven runs hot or lacks a fan, prop the door open slightly with the handle of a wooden spoon to let moisture escape. Dry the bread pieces for 90 minutes to two hours. To test readiness, pick up the thickest piece and attempt to break it in half. It should snap with a loud, clean crack, and the center should be completely chalk-dry with no softness or elasticity.
Let the dried pieces cool to ambient room temperature. Pack them tightly into clean glass preserving jars with rubber gaskets or tight screw-top lids. Sourdough dried below ten percent moisture content will keep at room temperature for six to eight months, provided the jar is kept away from direct sunlight and heat sources.
These preserved rocks of bread are effective thickeners for winter cooking. Drop three or four dried chunks directly into a simmering pot of beef, chicken, or roasted vegetable stock during the last forty minutes of cooking. As the bread hydrates, its gelatinized starches and mild sourdough acidity dissolve into the broth, giving the stock a silky body and an earthy depth that flour or cornstarch slurry cannot replicate. Strain the stock through a fine sieve if you prefer a smooth broth, or crush the softened bread into the pot with a whisk to build a rustic meal base.
Common Mistakes When Handling Stale Sourdough
A few frequent handling errors cause good stale bread to spoil prematurely or ruin a recipe:
- Storing stale bread in plastic bags: Sealing bread in plastic traps any remaining internal moisture against the crust, raising the relative humidity inside the bag. This creates the exact conditions required for mold spores to germinate within 24 to 48 hours. Keep stale bread in paper bags, in a breadbox, or out on a cutting board until you process it.
- Slicing a water refreshed loaf immediately: Cutting a loaf straight from the oven allows the internal steam to billow out, leaving the crumb gummy and causing the loaf to dry out within an hour. Always allow at least ten minutes of cooling time on a wire rack.
- Adding fresh aromatics to stored breadcrumbs: Mixing fresh minced garlic, fresh parsley, or damp lemon zest into toasted crumbs before storing them introduces water activity back into the jar. Use only dried spices and herbs for shelf-stable pantry breadcrumbs.
- Blending warm toasted bread: Running hot, toasted bread cubes through a food processor turns them into a clumpy paste rather than clean crumbs. Always allow toasted bread to cool completely to room temperature before grinding.
Practical Next Steps for Your Kitchen
Do not let bread management become an elaborate chore. A simple kitchen routine prevents waste with very little effort. Place a small, clean paper bag inside your pantry dedicated solely to dry crusts and heels. Whenever a loaf reaches day four and shows signs of losing its tenderness, slice off what you can toast, chop the remainder into rough two-centimeter chunks, and drop them into the bag.
Once or twice a month, empty that paper bag onto a baking tray. Run the tray through your oven on low heat to dehydrate the chunks for stock, or toast them with oil and herbs for your crumb jar. If you ever have doubts about whether a piece of bread is merely dry or starting to spoil, err on the side of caution and place it in the compost. With a regular system, very few slices of good flour, water, and salt ever need to go to waste.